Dogfight Walkthrough
Contents
- Read this first!
- Getting started
- Vulcan Cannon and Ammo Rack
- Spreadfire Cannon
- Plasma Cannon and Homing Missiles
- Fusion Cannon and Guided Missiles
- Smart Missiles and Blue Key
- Helix Cannon
- Gauss Cannon
- Phoenix Cannon
- Mercury Missiles and Yellow Key
- Omega Cannon and other unsolved puzzles
- Red Key and the final Earthshaker Missile
- Alien Boss
- Appendix: list of custom robots
Read this first!
Feeling trapped? Is your brain tangled with a tough puzzle, or you are getting overwhemled with robots? In any case, you must know that this walkthrough is a spoiler - which means, it can seriously disrupt your mood to continue the mission as it spoils all the fun by revealing all the secrets. You are advised to try your best to tackle any difficulties before consulting this walkthrough. You can also ask someone to read the corresponding section to you, so that other secrets will not be spoilt.
Please note that some puzzles or places may be solved and explored in no particular order. This walkthrough only shows the intended sequence, but there is no necessity to follow the walkthrough completely and accordingly. In addition, some places are abbreviated as letters for easier reference. The complete list of places is shown here:
A1 Start position: room with Omega Cannon
A2 Start position: room with hostage only
A3 Start position: room with hostage and a switch
A4 Start position: Earthshaker at ringed corridor
B Main corridor before blue door, which branches out to many weapons and the blue key
C Energy centre with Spreadfire Cannon at the top
D Place with 3 Smart Missiles and door locked on one side
E Bottom position of the lava-floored room, with the yellow door on the left
F Place with a Class 2 Platform robot just outside the red door
Getting started
You start in an enclosed space with an invulnerability, with lots of robots shooting at you. Slightly shift to your left / right so that you see a switch with some arrows pointing at. Shoot it, and the wall in front of you opens. Try to pick up the laser boost below the switch, and destroy the robots in this order: 2 Small Hulks, a Cloaked Hulk, the textured Smelter and the 2 Class 1 Platform robots. Act fast, as your Invulnerability is barely enough to take them out. Free the Guide-Bot at the bottom if you want. Follow along the curved corridor ring, killing 2 Secondary Lifters, 2 Class 1 Drones and a Defense Protoype Robot, giving you quad lasers.
In the room you start with, there are three rooms, one with the textured Smelter (containing a dropped Omega Cannon) which will be named A1, the one on the left with a hostage only which will be named A2 and one on the right with a hostage and a switch which will be named A3. Following through to the centre of the corridor ring, there is a fourth room with an Earthshaker in it, which will be called A4. Currently, none of these rooms are accessible, and do not attempt to hit any of the switches in it. Position yourself with your back facing the Earthshaker.
Vulcan Cannon and Ammo Rack
Follow the door in front of you, killing a P.I.G., a Lou Guard, and possibly 2 P.E.S.T. at the far end of the corridor. Get the laser boost dropped, and as you fly along the corridor, a wall opens in the ceiling, releasing the Thief-bot. Pick up the Flash Missile in that room, and repel the thief with your lasers. This main corridor will be called B. Now get to the first room on the right side of the corridor.
Blow up the Class 1 Driller on each side, and grab the Vulcan Cannon and some Vulcan Ammo (including those within some waterfalls below the position of each driller). Open the door and quickly blow up the Cloaked Driller to get a Cloaking Device. Take the Cloak, switch to the Vulcan, and enter the lava room. To take out each guy, you should shoot at the lava so that the rapid explosions will quickly kill them. Proceed to the corridor on the left, and (hopefully) with your Cloak still on, also blow the textured Smelter around the corner to pieces again by shooting at the lava. Shoot at the switch at the end of the corridor that opens the wall on the right to the Ammo Rack. Take it and all other powerups nearby, and proceed back to the main corridor (B).
Spreadfire Cannon
Back to B, you may encounter an Omega charging at you, as well as a Cloaked Lifter (both are stationed but not released by any events, so you may find them whenever you return to B before they get killed). Now go to the first room on the left of B (with a door). On the right is a secret door. Blow up the mine in it, and inside is yet another secret door. Take the 4 Flash Missiles inside, then head for the Spreadfire Cannon. As soon as you do so, 3 Fox Attack Bots will be released (from some locked doors), so prepare for a fight. After taking them out on each side, head down the corridor in front.
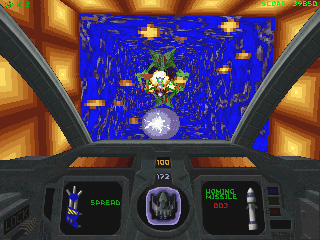
Get ready to blast with your Spreadfire! Watch out as lots of Advanced Lifters come swarming from within. When you descend into the energy center (which will now be called C), the robot makers are triggered and release loads of Medium Lifters. (In fact, each time you come back to access the energy centre they get triggered.) Pick up the Shield Converter at the bottom, and you may go through the door and blast the Cloaked Lifter behind to pieces. (This door is originally locked on the other side, but once you pass through it, it can be opened on both sides.) Go back up via the Energy Center to B (and blow up the Medium Lifters as they get generated again).
Plasma Cannon and Homing Missiles
Head along the corridor until you come to a split corridor leading on your left and right side. Pick the right side and head up, noting the textures on your left and right. At a point, the line seems to be "burnt" on both sides. Shoot above and below to reveal two secret doors, containing 4 Homing Missiles and 4 Flash Missiles each respectively. Grab them and continue to head up the tunnel.
There are three Class 1 Heavy Drillers at the top, the central one dropping the Plasma Cannon, and the ones on the left and right drop a shield each. Kill them quickly, preferably by stunning them with Flash Missiles to weaken them. Follow along the tunnel on the left with some energy boosts, and destroy the TRN Racer. Now position yourself back at the door where you got the Plasma Cannon (with a cloak on your right).
Open the door. The switch on the left simply turns off the lights in the room at the front, so shoot it at your own option. Below the switch is a secret door, containing 4 Flash Missiles, and another switch on the inner side. Shoot this switch to open the wall to the cloak. Get the cloak outside and approach the grate blocking the entrance to the large room, and it will be automatically opened, forcing you to confront the robots inside directly. Blast them to pieces quickly with your Plasma Cannon, preferably in this order: the Medium Hulk, then the 3 Lou Guards. Fill your ship with missiles at the end, and shoot the switch to open the wall that traps you in this room. Return to where you killed the TRN Racer.
Fusion Cannon and Guided Missiles
Open the door in front and destroy the Mini Boss in the distant with your lasers. Go down the corridor until you come to a door at the middle. Open it and destroy the Class 1 Platform robot inside. Carefully pick out the 2 Mini Bosses inside the room with your lasers also, and pick up the 4 Guided Missiles and the Fusion Cannon within. Exit this room.
Continuing down the shaft until you reach the bottom leads you to a fork. One side leads you back to the energy centre (C), while the other leads to a room with a lot of robots. You should go back to the energy centre via the outer path (along B) and access the large room at the bottom from the energy centre. Pick out all the Medium Hulk and the 2 Sidearms at long range with your lasers, then switch to your Fusion to blast out all Sidearm Modulas. Continue into the room to kill the TRN Racer and 2 Red Spiders in the corridor leading upwards. There will be loads of Red Hornets and Small Spiders spawning from them, so blast them all with your Fusion once more.
Look at your back which has a locked door. Inside is a cloaked Omega, so kill it before it gets the chance to smash into you. Head back outside and shoot along the floor until you open a door revelaing 4 Guided Missiles. Take it, and further shoot at the floor inside it to reveal another secret door, containing a switch. Shoot the switch and quickly return to the previously locked door (it is possible not to use any Guided Missile) to get a load of Guided Missiles. Ignore the door at the top for the time being, and return to B.
Smart Missiles and Blue Key
Head in front, which has blue textures on both sides to indicate the blue key is near. Destroy the Class 1 Heavy Driller at the bottom. Proceed to the fork, where the right is the blue door which has a path on the left, and the left path leads back to the door where you blowed up loads of robots with the Fusion. First head to the left side which leads to a large room on the right with some Boarsheads. Take them out, and grab the Smart Missiles they drop. (This room could be reached from the Fusion-blasting place directly, but there is a danger of confronting both the Class 1 Heavy Driller and the Boarsheads at the same time, which adds difficulty.) Notice that there is a locked secret door at the centre of the room. It is not yet accessible, and this place shall be marked as D.
Head back out and under the flickering light is a hidden door, containing another Smart Missile. Now take the path to the left of the blue door, which leads to yet another door around the corner. Enter and get ready for a big fight. Pick what you like and destroy 2 Smelters, 2 BPERs, 2 Diamond Claws and a Red Fatty Jr inside, which drops another 3 Smelters to be killed. Follow along the corridor until you come to a sign on your right, which indicates a hidden door on the left. Open it to reveal some shield boosts. Continue upwards and you will meet 3 Smart Missiles behind a grate, together with a Boarshead at the far end. Kill the Boarshead, and directly below it is a hidden door with a Mega Missile. Both the trapped hostage and the Smart Missiles are related; and shooting behind the Smart Missiles reveal a hidden door which leads back to D. However, since the door closes with time, and there are far too many corners, it is far from possible to open it on the other side with Guided Missiles. Thus, this place will be accessed later.
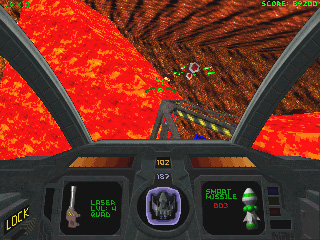
Go back to the lava corridor, and head along the path until you come to a large clearing. Kill the Defense Robots quickly as they are very powerful (you may need to use some Smart Missiles). Then move on to the two Super Hulks behind, which fires Mega Missiles and are armed to its teeth. Try to use the walls as barriers. It is recommended to use both Guided Missiles and Smart Missiles to weaken them. When you have took them all out, take the blue key and proceed to the blue door. As you head back out, a door opens with a dozen of Red Hornets, so blast them all out with the Fusion once more.
Helix Cannon
Enter the blue door. (You may encounter some Ice Spindle Defense Robots, so kill them when you do.) In front of you is an Invulnerability with a Helix Cannon behind the grate, and on your right is a Guided Missile with a locked door. The trick is simple - fire a Guided Missile into the grating, and make a turn at every ceiling light until you open the locked door from the inside (which is unlocked). Now the Helix Cannon is accessible.
Now take the Invulnerability and get ready for blasting! Dive down and meet loads of robots and unleash the power of your Helix. Make haste, as a Super Hulk awaits you at the bottom corridor and you should defeat it with your Invulnerability still on. You are advised to add some missiles (Homing Missiles) to enhance your firepower, especially on higher difficulty levels. Note the 4 Guided Missiles behind the grate, and this will be accessed later.
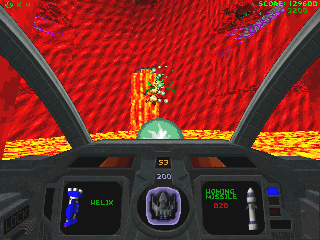
When flying across the corridor, there are some energy centre signs on the walls, and there are hidden doors at the ceiling of each sign, where there is indeed an energy centre with some energy and shields. Get in to recharge (which I'm sure you need after using the Helix), and enter the next large room. Get ready for blasting with the Helix again! A cloaked Diamond Claw should come charging from the top, together with loads of Advanced Lifters spawning from the robot makers. Notice a lava fall straight ahead of you. Pass through it to get a Guided Missile, and shoot at the switch in the ceiling to open the grate to the 4 Guided Missiles stated previously. Note that the yellow door is on your bottom left, and the way to the yellow key is on the bottom right. This position will be called E.
Gauss Cannon
Fly up the room until you come to a dark room with only a light in the centre of the cross, with a robot maker directly behind you. Purge the room of any robots, which include Bulk Destroyers, Cloaked Lifters and Cloaked Drillers. At each corner of the "cross" (as seen from the automap), there is a hidden door directly above it, which contains some powerups (including the Headlight). The left and right end of the chamber also has a hidden door beside it with some additional powerups.
Take the Gauss Cannon, and directly in front of you is a grate with a Super Laser boost behind it. Note that there is another cloaked Omega behind it, so kill it first, and then shoot the switch on the ceiling to open the grate. Take the Super Laser, and head out, in which a robot maker will be triggered, spawning Diamond Claws. (This robot maker will also be triggered when you come out from the yellow door.) Kill them (preferably) with the Gauss Cannon and proceed to corridor on the right of E to advance towards the yellow key.
Phoenix Cannon
Destroy the Seeker at the door in front, and the P.I.G. on your left to reveal another Super Laser boost behind a grate. It is not accessible currently, so proceed towards the door. The next room contains two Smelters, so destroy them quickly. Note the Phoenix Cannon trapped in the centre of the room by walls. Now there is a path above and a door below in front of you. Take the upper path, and destroy the E-Bandit directly on the left.
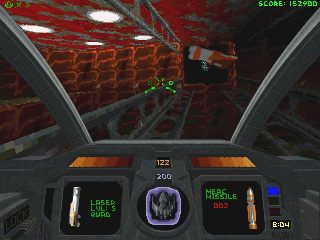
As you move on, a wall closes behind you and another opens up in the ceiling, revealing a Smelter. Kill it and hit the switch to open up the wall behind you. Proceed and kill 2 Smelters in the next room. Pick up some shield boosts and take the 4 Guided Missiles. Note the locked door on the left of the Guided Missiles, which leads to the Phoenix Cannon. The trick is simple: shoot the door from the outside (which is unlocked) and quickly enter from the other side to take the Phoenix. Upon entering, a locked door opens on the other side, revealing an Extra Life. Take it quickly, as this door opens once only.
Now exit this room to return to where a P.I.G. dropped a Super Laser boost. Now a door in there has opened and revealed 3 Red Hornets. Kill them, and then switch to your Phoenix Cannon. Fire into the ceiling behind the grate, in hope of hitting the switch inside. Once that is done, the wall to the Super Laser is opened, and you now have Super Laser Quad Level 6.
Mercury Missiles and Yellow Key
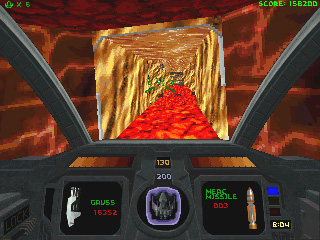
Return to where you got the Phoenix Cannon, but this time head for the door below. The next room is packed with Bulk Destroyers and Seekers, and are excellent sniping targets for your Gauss Cannon! So make full use of it, as there are plenty of ammo to replenish. After blowing everything up, first take a right turn to kill a Super Hulk (keep it under constant fire to prevent it from firing Mega Missiles). Then take everything in this large room, and note the grate with Mercury Missiles behind it (actually there is a Bulk Destroyer in it, so kill it if you haven't).
It's the same old trick with the Phoenix: try to hit the switch above (around the corner) by shooting at the wall directly in front. When the switch is hit, the wall is opened, giving you plenty of missiles and ammo. Use the cloak above wisely on the way to the yellow key, and also rescue the hostage on the left.
Blast your way through the corridors where you killed a Super Hulk. You will encounter 2 textured Smelters and a Medium Hulk along, and 2 Class 2 Platform robots in the large room at the end. Whoever complained Seekers are too easy to kill, now challenge this! You should kill the Class 2 Platform robots with the Gauss Cannon as they can emit quite a lot of plasma blobs when hit with energy weapons. Each robot further drops 2 more Seekers, so be prepared for a big fight. When all is done, take the shields and the yellow key at the end of the room. A wall in the ceiling will open behind you, releasing 3 E-Bandits, so quickly kill them (preferably with the Helix at close range). Exit all rooms and head for E.
Omega Cannon and other unsolved puzzles
Fly a long way to the Omega Cannon (A1), which is near your start location. Use the Phoenix Cannon twice to get it: first open the secret door at the ground, then shoot the Phoenix to try to hit the switch on the inner side. This opens up the wall in the ceiling of the cannon. Notice a locked secret door above you, which blocks the way to the Omega. Simply open it from the other side with the Phoenix Cannon, and the Omega is yours!
First head to A3 (the one with hostage and a switch). Do not hit the switch. To open the wall trapping the hostage, again use the Phoenix Cannon to hit a hidden switch on the inner side. Rescue the hostage and take the Afterburner in the upper space. I repeat, do not hit the switch yet. It will be referred to later.
Now head to A2 (the one with a hostage only). Rescuing this hostage is a bit tricky. Again it uses the Phoenix Cannon trick, but to hit a switch on the inner side, you must first blow up a hostage door that blocks it, in other words you should keep shooting at the inner side with the Phoenix until you hit the switch. Then the wall trapping the hostage will be opened, and rescue the hostage and take the Full Map.
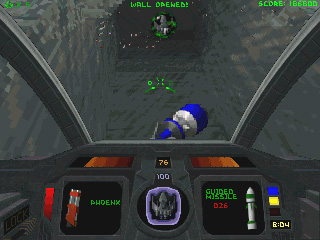
Fly to the Earthshaker (A4). (You should save game first.) Launch a Guided Missile and hit the switch at A3 (which I previously told not to). A door will open above the Earthshaker, revealing an Extra Life. Quickly use the Phoenix to hit a switch on the inner side of that room, to open the wall blocking the Earthshaker. Grab both powerups and head for D (the place with 3 Smart Missiles and another hostage) from the side where you got the blue key.
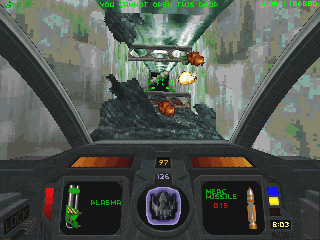
As mentioned previously, the door is locked from one side and unlocked from the other, but it is too far away to be opened by Guided Missiles. Instead, use the long corridor to throw a Smart Mine into the grate. Then patiently wait on the other side for it to detonate (which may take up to 2 minutes) and open the door, giving you 3 Smart Missiles. As soon as you take them, a door further opens up in the ground, revealing a Mega Missile and a switch. Hit the switch, and the wall trapping the hostage is opened. Return to the other side to rescue the hostage, and head for the yellow door.
Red Key and the final Earthshaker Missile
Open the yellow door and kill the Defense Robot inside it from a safe distance. Now is the showtime for the Phoenix Cannon! Starting from the top storey, pick out every single robot in the next level by shooting around corners, and grab the powerups they drop. The robots get increasingly tough, but still, you are well protected from their deadly weapons. (If necessary, head back out to E to recharge.) When you have reached the lowermost level, kill the Class 2 Platform robot in a long corridor. Note that there is a locked door behind it. That place will be named F.
Next is the showtime for the Omega Cannon. As you follow the left corridor to advance to the red key, the robot makers are generated, spawning loads of Class 3 Gopher robots which drop Proximity Bombs. A door will also open, with 6 Omega Guppies gushing out. Use the Omega Cannon to kill them swiftly and brutally, or you will have to hunt them down in the next "maze" room.
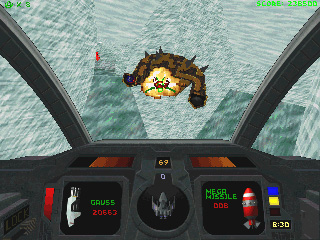
When you come to a large clearing, kill the 2 Spiders, which drop 10 Spawns each, so use your Omega again (or if you're accurate enough, use the Fusion). Get yourself ready as you approach the "mini boss". Exhaust all your Megas (and possibly other missiles) and fire with the Gauss rapidly. If you can manage to keep it under constant fire, it can't fire any Earthshakers at all!
After defeating it, take the red key and follow along the corridors. Watch out for mines and Omegas charging at you, but you can kill them with the Gauss and replenish your shields. When you have reached the end of the really long tunnel, you should discover an Earthshaker behind a grate. Here comes my favourite puzzle in the game. If you shoot behind the missile (and you should), you should discover that the door opens and remains opened. The other side of the door is in fact F. Now exit and return to the red door (not advancing towards F yet). By now, there should be another door opened, with another 6 Omega Guppies charging out. The robot makers will also be triggered, so be prepared to use your Omega Cannon rapidly once more.
Now position yourself facing F. If you approach the Earthshaker directly, the door closes, and you'll have to shoot it on the other side to open it again. Yet, note that you cannot plant Smart Mines to open the door as the gratings are too dense, and it is not really possible to open it with a Guided Missile too, as there are too many curves and the distance is far too long.
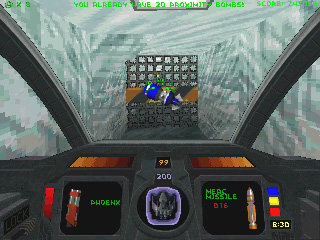
The solution is this: switch to the Phoenix Cannon, and save game! Shoot the Phoenix, and only then approach the Earthshaker. This is to hope the phoenix will pass through the grate, and come back at a second time to open the door when it has closed. Indeed, this trick is very difficult, but it is truly possible to achieve. Restore game whenever the door has closed and not reopened, or you've shot yourself. Once you have taken the Earthshaker successfully, advance to the red door.
Alien Boss
Below the flickering light at F is actually a secret door with an Invulnerability in it. Take it and enter the boss room! Two robot makers will be immediately triggered, and the left spawns Class 2 Platform robots and the right spawns Defense Robots! The suggested sequence is this: first kill the Defense Robots with your Invulnerability on, and then defeat the Class 2 Platform robots from a long distance with your Gauss Cannon and Mercury Missiles (even Megas if you still have any). When things get too tough, start firing Guided Missiles around a corner to weaken them. After everything is destroyed, be prepared for the big boss.
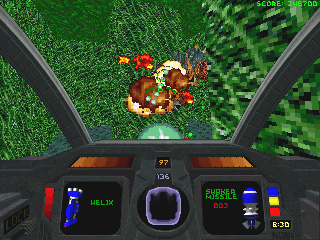
Shoot the switch on the right side of the boss room to open up the wall at the centre, revealing the boss within and an Energy Centre. Just like the original Descent 2 mission, this boss is only vulnerable to energy weapons (although Earthshakers can damage him too). So make use of the Energy Centre (and the cloak inside) to fight the boss! You are recommended to use either the Helix or the Phoenix, together with Smart or Earthshaker Missiles. Although the Smart Missiles he fires are deadly, by circling around the room, it is very possible to evade them. Simply fly around while bombarding him with your weapons. He has quite some shields, but it is of course possible to destroy him.
With the boss killed, get out of the red door, and head for the Exit, which is directly behind the yellow door. Kill the last Defense Robot inside it and the mission is completed!
Appendix: list of custom robots
This is the list of custom robots used in this mission. Most robots with tough weapons such as the Class 2 Platform Robot or the Super Hulk also have higher shields as well, to make them even tougher.
- Textured Smelter: Fires Omega Cannon (rather than Phoenix)
- Medium Hulk: Fires Homing Flash Missiles (rather than Concussion)
- Cloaked Omega: self-explanatory
- Defense Robot: Fires boss-type Smart Missiles and can generate plasma blobs
- Super Hulk: Fires Mega Missiles (rather than Homing)
- Class 2 Platform Robot: Fires multiple Mercury Missiles very rapidly; can generate plasma blobs
- Class 3 Gopher Robot: Drops Proximity Bombs on default, and also leaves Proximity Bombs when killed
- Omega Guppies: Leaves Smart Mines when killed
- Descent 1 Boss 1: Fires Earthshaker Missiles instead of Smart Missiles
- Alien Boss 1: Fires Smart Missiles (rather than Gauss Cannon) and Mercury Missiles